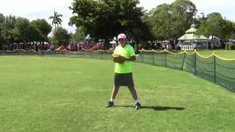
Standing Drills
Standing width drill
Player stands shoulder width apart facing his partner about ten feet away. The player is in an athletic position. He keeps his hands in front of his face just below eye level. His elbows form a triangle in front of his chest. The player initiates the toss by breaking his thumbs over his pivot foot thigh and circling up to shoulder height with his hands and elbows. Coaching tip- the top of the throwing wrist should lead the way to shoulder height and the fingers should be pointed to the ground. Once in this T position the player pitches the ball to his partner by bringing his glove side elbow down to his front hip, and rolling his thumb behind his throwing hand. The pitcher continues the exchange by rolling his throwing shoulder in front of his chest and the throwing hand in front of his face. When he releases the ball the back of his hand is facing the sky. After releasing the ball his throwing fingers are pointed down to the ground and his hand finishes across his stride leg. His throwing shoulder finishes by pointing at the target. Keys to the drill*** Player focuses on the web of his partners glove with his eyes. Partners should give different targets. Four of the pitchers six sights are involved in the drill. His elbow or glove hand, his eyes, the throwing hand and throwing shoulder. Purpose of the drill is to eliminate the lower half and feel his upper body go through the proper progressions.
Standing length drill
The pitcher takes an athletic stance shoulders width apart facing his throwing partner. The pitchers front hip and shoulder are facing his partner. The pitchers hands are in the middle of his body with the palm of his glove facing his chest and his throwing hand in the web of his glove. His elbows form a triangle back to the pitchers chest. The pitcher’s head is centered over his belly button and moves inside his back leg when he breaks his hands down and circles up to make his toss. All of the same techniques apply as previously stated in drill# 1. To initiate the toss, the pitcher pushes his weight back to his belly button using his pivot foot to initiate the movement. Once his weight and head are over the belly button the exchange is made as previously stated. The mechanical progression is as follows:
1) hand out in front of the face releasing the ball
2) chest down over the stride thigh 3) eyes going out over the stride toe.
Keys to the drill*** Keep the front toe at a 30 degree angle to the throwing side. Focus on the exchange. Make sure both arms are working together in time and sequence. Keep the chin down on the front shoulder and make sure it is down on the back shoulder when finishing the toss.
Load up in four
This drill starts at the point where we gather all of our weight over the rubber and make our way to home plate to deliver the ball. We lift our stride leg up and our knee going back toward center field, with our stride foot toe relaxed and pointed to the ground. This balanced position has our front hip and shoulder facing our target, our chin down over our front shoulder and our hands facing our chest (in front of the back pectoral muscle). Our elbows form a triangle facing the pitchers chest. We begin the pitching motion by breaking our thumbs down inside the pitchers thighs and at the same time coming straight down with our stride leg forming the top of an L. When the stride leg and arms are almost straight we circle the hands up to shoulder height and make the bottom of an L with the stride leg. As that front side gets out toward our target we sink slightly on our core to put weight on our lower half as we deliver the ball to home plate. When done properly the pitcher will feel weight on the inside of his pivot foot and use it to push his body forward to make his toss. As the stride foot touches down the pitcher makes an exchange with his front side arm and shoulder and back side arm and shoulder. This action is created by closing the under portion of the front side elbow and forearm down to the front hip. This action causes the front side shoulder to tilt slightly downward. While this action is happening the back side shoulder is rolling in front of the pitchers chest and his throwing hand is rolling in front of the pitchers face. This position is where we want to release the ball from. At release, the back of the pitchers hand is facing the sky and the throwing fingers face the ground after releasing the ball.
Keys to the drill*** Pitcher creates a good balance position to deliver the ball. Gain momentum by making an aggressive L with the stride leg and smooth C’s with stride and throwing arms. ** Glide smoothly toward your target when you push your weight forward off the inside of your pivot foot. Remember to sink on your core as you are getting out and not when you are over the rubber. Avoid jumping to your front side.
Chair Drill
This drill utilizes a folding chair opened and the front seat facing the pitcher. The pitcher puts his stride leg toe on the front of the back portion of the seat of the chair. The action is initiated by taking his stride knee back toward center field and taking his foot off the chair. He then creates his L with his stride leg and the hands and arms create their C’s. The pitcher glides in front of the chair with his stride leg as the pitcher sinks on his core and pushes his weight forward from inside his pivot foot. Immediately after pushing his weight forward with his pivot foot he kicks over the front seat of the chair with his pivot foot and lands even with his stride leg foot.
Keys to the drill *** the purpose of the drill is to get a nice high kick with our pivot foot. As we push our weight forward with our pivot foot we think about kicking the first baseman in the head with our heel or the third baseman if we are left handed.
Another key is to turn the pivot foot knee in toward your stride leg knee when we kick our heel out.
T drill
The pitcher stands on the mound placing his pivot foot against the front of the rubber as if he was going to throw out of the stretch. He then marks off five and a half of his own foot size steps going toward home plate. He does this by putting one foot in front of the other. He initiates the mark off by placing his stride foot heel against the middle of his pivot foot. He then begins his mark off placing one foot in front of the other. When he gets to the Five and a half foot distance he makes a horizontal distance line to mark the spot. The pitcher then goes back to the rubber with his back facing home plate marks a directional line straight to the distance line. This is the practice T. The goal of the pitcher is to land where the two lines meet when doing his motion drills out of his three windups. We found doing five reps with the slow stretch, slide step, and wind up is a good amount to keep the quality and focus each drill session.
Keys to the drill*** Coach can determine if the pitcher is opening too soon, or throwing across his body by where he lands on the T. The optimum landing point would be where the two lines meet. If the landing point is more than a couple of inches to either side the pitcher has to work on his ride to the plate. Leading with the stride foot heel and side of the front foot and placing the foot at a Thirty degree angle at strike down will solve a majority of the opening to early and throwing across the body problems.
Towel drills
The pitcher places a folding chair facing him on the rubber at some point beyond his five and a half mark where he can extend his hand and slap the seat of the chair with a towel held in his throwing hand. The pitcher’s goal is to get as much extension as he can. The closer we get to home plate at pitch release the less reaction time the batter has to the pitch. The pitcher goes through his complete pitching motion when doing towel drills. The goal is to simulate game tempo and release when striding to and striking the chair. The pitcher will do Five reps of each wind up (slow stretch, slide step, windup)
Fence Drills
Balance and break is our first fence drill. Standing in front of a fence about five inches from the fence the pitcher will face the fence with his front side hip and shoulder. He will load up in position four and practice making the top of an L without touching the ground and breaking his hands and thumbs down inside his thighs without falling forward into the fence in front of him. This drill helps us to keep his weight over the rubber for the pitcher’s balance point. The pitcher should do ten reps each drill session.
Keys to the drill *** Great drill for eliminating a pitcher from coming out to early. The pitcher gains a key sense of balance that gives him confidence to deliver properly in the game. Make sure the pitcher holds the balance position for a few seconds between reps.
Clock Drill – Pitcher stands in front of a pole on a fence shoulder width apart with his throwing side hip facing the pole. Breaking his hands and thumb over his pivot foot thigh he rolls his hand up to a T position and touches the part of the clock that makes him equal and opposite to his natural break. The poll is 12:00 o’clock. If his throwing hand breaks at 6 o’clock his glove touches at 12:00 o’clock. If he breaks at 7 o’clock his glove touches at 1:00 o’clock. (Equal and opposite) The pitcher then makes his exchange and replaces his glove hand with his throwing hand on the fence. The pitcher then pauses in this position and then finishes his rep by coming down across his stride leg.
Keys to the drill*** Determine the pitchers natural break by standing behind him while he goes through his motion. His break on the clock comes from his hand position as he clears his throwing side thigh. For a righty it will be 6, 7, 8, or 9 o’clock. A lefty will be 6, 5, 4, or 3 o’clock. The glove will roll up and touch the corresponding opposite on the clock on the fence. The hands are then exchanged to complete the rep. Seven to ten reps are recommended for this drill.
The final drill in the fence package is the kick up on the fence drill. This drill is done by standing parallel to a fence about a half a foot away. Out of the stretch position the pitcher goes through his pitching motion and after pushing to his front side with his pivot foot, he kicks his pivot foot up on the fence and holds that balance position a few seconds for each rep.
Keys to the drill*** this drill incorporates all aspects of the throwing motion with emphasis on balancing the weight on our stride leg. This drill makes the pitcher focus on releasing the ball with his hand, bringing his chest down to his thigh and getting his eyes over his stride toe. After the exchange the glove hand is held in front of the chest for maximum balance.
Those are our baker’s dozen drill package. When done diligently a pitcher will see huge improvement in all aspects of his pitching